People seem to warn you about a lot of things before you have children, but the amount of artwork these little critters bring home / create was definitely not something I was prepared for. It's never ending and I was determined to find an attractive way to get it all displayed. My stipulations were it had to be cheap and it had to be versatile - so you could add and switch out content in seconds. So today I'm sharing my not so scientific approach to this wooden artwork wall! I chose to leave mine raw and unstained, however you could easily stain or paint! The below printable PDF is at a scale of 1'-0" = 1", however you could easily scale this design if your wall space is smaller.

Click the link below to download the printable PDF file for your use!

MATERIALS NEEDED:
1. 2" x 1" solid wood strips. For staining, use oak or walnut. For painting, use poplar or birch.
2. 1/4" braided rope
3. 2" long wood screws
4. 1/4" wood screw dowel caps
5. Drywall Screws
6. Flame torch for rope
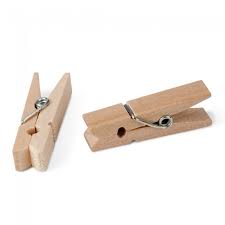
7. Mini clothes pins for hanging artwork
DIY STEPS:
1. Download FREE template pdf for all measurements
2. Create 3 ft x 9 ft rectangular frame from 2" x 1" wood strips
3. Cut diagonal strips and adhere with wood screws
4. Paint or stain - unless you want to leave raw like mine!
5. Drill pilot holes for rope. Holes should be 3/8" for 1/4" rope.
6. Torch or burn the end of the rope to make it easy to string through your hole. Tie knot at each end to secure in place. Torch knots to make sure they stay tied. You don't need much flame!
7. Adhere to wall with drywall screws and a level. Cover mounting holes with 1/4" wood screw dowels.


Comments